
This post may contain affiliate links. That means we may make a small commission on items purchased through links in this post at no extra cost to you!
This post is all about how to paint a checkered wall
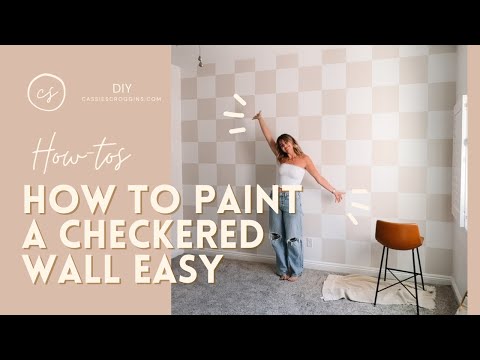
After blogging and doing social media full time for the past 8 years, we finally decided it was about time I had my own space to work, film, and create it. So we’re converting one of our bedrooms into my very own content room! First up: painting my own checkerboard wall!
I DIY’d this checkered wall in one day and I’m obsessed with how it turned out! I ended up loving it so much I copied it onto its opposite wall too.
A checkerboard wall is a perfect way to add some character and personality to any room in your house. You can customize the colors to match your own style and decor, and the best part? It’s actually really easy to do.
After revealing my new checkered wall on Instagram as a part of my Content Room Makeover series, you guys asked for a full tutorial so here’s exactly how to paint a checkerboard wall step-by-step.
(Keep scrolling for video tutorial!)
- Materials – What you need:
- How to Paint a Checkerboard Wall
- Step 1: Prepare the Wall
- Step 2: Measure and Mark Horizontal Line 1
- Step 3: Tape Off The Horizontal Line 2
- Step 4: Tape Off The Rest of The Horizontal Lines
- Step 5: Measure and Mark Vertical Lines
- Step 6: Tape Off The Rest of The Vertical Lines
- Step 7: Paint First Set of Squares
- Step 8: Remove Tape and Re-tape New Squares
- Step 9: Paint Second Set of Squares
- Step 10: Remove Tape and DONE!
- Video Tutorial: How to Paint a Checkered Wall
- Conclusion:
Want to remember this post? Pin it to your favorite Pinterest board!


Materials – What you need:
- Frogtape Painter’s tape (the best tape for sharp edges)
- Measuring tape
- Pencil
- Laser level
- Paint (2 contrasting colors)(my walls were already white, then I used 2/3rds of a quart size can of paint for one 12 ft by 9ft wall)
- Roller brush (I used a 4′ roller)
- Small paintbrush for touch-ups
- Paint tray
- Paint can opener
- Dirty towels (optional)(to protect the floor)
Note: My wall was already painted white before (Color: Cool December by Dunn Edwards), so this tutorial is only for adding one color of checkers on top (I used Mountain Gray by Glidden for the checkers). Not painting two new colors although the principles could be the same for painting 2 colors. Or be sure to paint the wall one solid color first.
How to Paint a Checkerboard Wall
I highly recommend reading through each step below AND watching the video tutorial (at the bottom of this post) all the way through before starting your checkered wall project!
Step 1: Prepare the Wall
Before you start painting, make sure your wall is clean and smooth. If there are any holes or imperfections, fill them in with spackling paste and sand them down once dry. This will ensure a smooth surface for painting.
Next, use a damp cloth to wipe down the entire wall. This will remove any dust or debris that may affect the paint application.
Step 2: Measure and Mark Horizontal Line 1


Using your measuring tape and pencil, mark out where you want your checkered pattern to be on the wall. I chose to have each square be 1 foot by 1 foot, so to start I marked 12″ up from the top of my baseboards.
Then, using my laser level, I made a horizontal line straight across those 12″ marks, making sure the laser passed through all the 12″ marks across the wall.
Then I taped off that 12″ section by taping directly ON TOP of the laser line. This ensures that there is 12″ of open space for painting and the tape is not cutting into those 12 inches.
I chose to work in one section at a time instead of making 12″ section marks all the way up the wall just to ensure that, even after taping, all the measurements were still accurate.
Step 3: Tape Off The Horizontal Line 2


This is important! Starting from the BOTTOM of the first tape line (remember the bottom of the tape to the baseboards is 12″), measure another 12″ up. Again, like before, make marks along the wall then use the laser level to make a straight level line through all the marks.
Now, using the laser line as a guide, place your tape directly BELOW the laser line. So now for the second line, the TOP of the top tape to the BOTTOM of the bottom tape will be 12″.
Keep in mind that for this second row, because the tape is about 2″ thick, there will only be about 8 inches of open wall space since 2″ of tape on top plus 2″ of tape on the bottom is cutting into the 12 inches. Unlike the first row where the entire open space, not including tape is 12″.
Because the tape is 2″ thick, you have to paint in every other row. You can’t paint all checkers at once. That is why you will have alternating rows of 12″ of open space, then 12″ of wall space INCLUDING the tape. Trust the process.
Step 4: Tape Off The Rest of The Horizontal Lines


Repeat the measuring, marking, and taping process until you reach the top of your wall. Remembering to alternate taping directly ABOVE the laser line then BELOW the laser line for the next line. Leaving alternating rows of 12″ of open space, and shorter rows of only about 8 inches of open space (because of the thickness of the tape) for painting.
Step 5: Measure and Mark Vertical Lines

Now it’s time to create the vertical lines for your checkerboard pattern. Note you’ll only be adding vertical tape lines on each of the 12″ open space rows and not on the skinnier rows were the tap is cutting into the 12 inches.
Starting from the bottom row (which has 12″ open painting space) at the corner, measure out 12″ and make a mark on the tape (top of row) and on the wall on top of the baseboards (bottom of row).
Then add two vertical pieces of tape. One on the corner of the wall, one on the opposite side using the marks you just drew, placing the tape on the outside of the marks creating an open 12″ by 12″ square.
Finally don’t forget to tape off a horizontal piece of tape on top of the baseboards (bottom of the 12×12 square).
Using the same method as the horizontal lines, measure from the INSIDE of the tape (the open space) 12″ out and mark. Then place the tape so the vertical lines alternate 12″ open space and 12″ including tape.
So you’ll alternate measuring and marking from the inside of the tape then the outside of the tape over and over.
Note: You’ll only need to add vertical lines to the rows with 12″ of open space (every other horizontal row) since those are the rows you’ll need to paint first.
Step 6: Tape Off The Rest of The Vertical Lines
Repeat the measuring, marking, and taping process on each of the rows with 12″ of open space (every other horizontal row) until you’ve taped all the vertical lines for each 12″ open space row.
Remember to alternate taping directly in front of your mark and then behind the 12″ mark. Leaving alternating columns of 12″ of open space, and skinnier columns of only about 8 inches of open space (because of the thickness of the tape) for painting.
Step 7: Paint First Set of Squares

Now it’s time to paint each of those open 12″ squares you just taped off.
Use a roller brush to paint each square. Then use a smaller brush to get into all those tight spaces in the corners or by the ceiling. Allow the paint to dry then do a second coat.
Step 8: Remove Tape and Re-tape New Squares


Once the first set of squares are dry, remove the tape from the first set of squares. Then you can simply reuse the same tape to re-tape the second set of squares placing them in the rows we skipped.
Do this by placing tape to line up with the tops, bottoms, and each side of the previsouly painted squares so that your new 12″ open space square touches corner, to corner, to corner, to corner with those first painted squares.
Step 9: Paint Second Set of Squares


Repeat Step 7 for painting the second set of squares. Allow paint to dry then do a second coat.
Step 10: Remove Tape and DONE!
Once all sets of squares are painted, carefully remove all remaining tape from the wall. You should now have a beautiful checkered pattern on your wall!

Video Tutorial: How to Paint a Checkered Wall
Conclusion:
I’m obsessed with how my checkered wall turned out! It adds a unique and fun touch to my room, and the best part is that it was easy to do and only took me one afternoon to complete! So if you’ve ever wondered how to paint a checkered wall pattern? Now you know! I’m excited to see how your checkered wall turns out too! DM or tag me on Instagram @CassScroggins!
Want to remember this post? Pin it to your favorite Pinterest board!


